
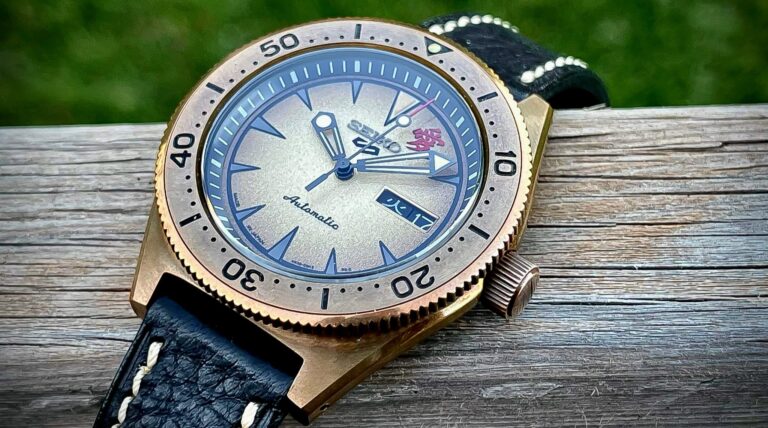
How To Mod A Seiko SKX007
Watch Modding Introduction
So you want to learn how to mod a Seiko SKX007? Well here at Watch-Modz we strive to provide more than just parts, we also provide knowledge! We have written this guide to modding your first Seiko, and we are giving it away for free to everyone that wants to learn!
In the event that this is your first attempt at any watch modding at all, the concept and thought of the process might seem daunting, complicated and time consuming. This could not be further from the truth! Once you learn to mod a Seiko SKX007 there’s no turning back. Watch modding is one of those hobbies that turns into an obsession very quickly.
If you ever feel overwhelmed we have created a strong community of fellow watch modders where you can find help. Our group Watch Mod Enthusiasts is growing fast and is filled with experienced modders and custom part makers. Share mod ideas, photos of your completed builds, or just to ask any questions you might have. Our memebers are very friendly and love to help out. Join today and also recieve exclusive discounts only available to group members. Now let’s get started!
All The Information Needed To Learn How To Mod!
What’s Covered in This Tutorial
- How to change your bracelet
- How to change the bezel/bezel insert
- Opening the Case Back
- Changing a Crystal to Sapphire
- Changing the Hands
- Changing the Dial
- Upgrading the Movement to NH36
- Alternate cases that will fit all of your SKX007 parts
- Where to Buy Tools
- Where to Buy Parts

Getting Started
Table of Contents
The tools you need
When it comes to tools, the basics will get you through most modifications. As you become more experienced you will procure other job specific tools for more advanced modding.
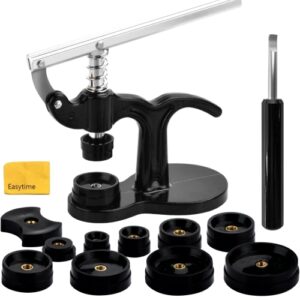
An easy way to get the majority of the tools you need for modding your first Seiko, is to buy a basic watch repair set from Amazon. These come at a very affordable price usually around $16 and will carry you through a majority of your modding needs.
These sets typically include screwdrivers, a spring bar tool, case back remover, tweezers, and a few other important tools. This is a great starting point and will get your foot through the door into the modding world without hurting your wallet!
At the end of each tutorial, links will be provided for each tool you will need for each mod. This will help you buy the right tools depending on what your mod objective is
(if you aren’t modding the entire Seiko).

Changing the Bracelet
Now some people do not consider changing the strap of a watch an actual mod, but for all intents and purposes we do! Changing the bracelet of a watch can completely change the appearance. To choose the proper strap you must first know your lug size. The standard Seiko SKX007 comes with a 22mm lug size so finding straps are pretty straight forward. However, if you purchase an SKX007 conversion case, some may come with 20mm lugs, so be sure to check product descriptions.
The lugs hold the strap/ bracelet to the watch and is where the spring bars sit. If you are unsure what the lug with is of a particular model, just do a quick search on google. I guess you can say size does matter! There are several styles of bracelets and straps on the market that can fit your SKX007, and we carry some quality straps on site HERE.
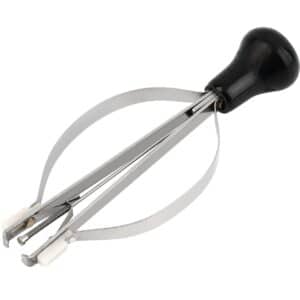
To change the strap, you will need the spring bar tool that is included in the Amazon tool kit mentioned earlier. The tool has a “V” shaped point that can “grab” the shoulders of the spring bars to pull them out of the lug holes. Just pop one side of the spring bar out and then the other and the strap will come straight off. To attach the new strap sometimes you will not need a spring bar tool if the strap has a quick release option such as some of the Ritche Watch Bands on Amazon.
If the strap you buy does not have quick release spring bars, then you just insert one end of the spring bar into the lug hole on the watch. Then you use the spring bar tool to compress the other end of the spring bar so it can pop into place. This can be a little tricky if you are using a metal bracelet with solid end links (SEL).
Sometimes spring bars can launch into the atmosphere if you’re not careful, never to be seen again. But don’t fret! You can find a spring bar replacement kit on Amazon for a very affordable price!
Watch This Video:
Tools You’ll Need Only If Changing A Strap:
- Spring Bar Tool
- Extra Spring Bars (Optional)
Learn How To Mod The Bezel/Bezel Insert
One of the easiest mods to perform on your Seiko SKX007 and one you’ll see often, is a bezel and insert change.
Now first things first, a bezel and a bezel insert are not the same part, but rather 2 separate parts that fit together. The bezel is the part the actually rotates around the crystal and is held on with only pressure, while the insert is simply the numbered piece that adheres to the top of the bezel. Choosing a bezel and bezel insert is completely dependent on your style choice. a common bezel type would be the Coin edge or Sub style. If these aren’t your preferred style, there are many other options. As long as the bezel is designed to fit a Seiko SKX007 then you’re good to go!
This is not true for the Bezel Insert because the shape of the bezel insert you buy will depend on the glass you choose. If you have a flat glass or OEM Hardlex, then you will need to use a flat bezel insert designed for SKX007. These measure at 38mm outside diameter, and a 31.5mm inside diameter. They come in a variety of materials including ceramic, steel, and aluminum.
If you have a double domed sapphire crystal, then you will need a sloped bezel insert so that it sits flush with the crystal edge. Another thing to note is the bezel gasket, these are usually pre-installed like the ones found on Watch-Modz. If you purchase from us then you do not have to worry about installing one, but if you buy from another supplier and it does not come preinstalled you will need to purchase this separately.
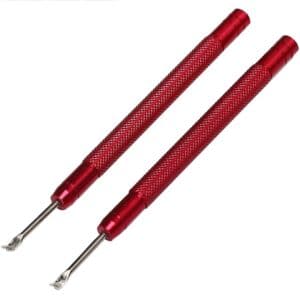
To remove the bezel, you will need either a case back knife, or another sharp blade that is thin enough to slip under the bezel. Either one will work fine. We first use a thin razor blade that easily slips under the bezel to give a slightly bigger gap. Then, you simply wedge the tool (or thin knife) in between the case and the bezel and twist the tool. NEVER PRY AT THE BEZEL, JUST TWIST THE TOOL! Prying at the bezel can bend the bezel making it unusable if you ever want to change it back. Always twist the tool and the bezel will pop right off.
One thing to pay attention to is, since the bezel opener is usually made out of metal, you could scratch the case when doing this procedure if you aren’t careful. If you are worried about scratching the case, just use a little electrical tape over the case for protection against accidental slips.
Once you have removed the bezel, removing the bezel insert can be done simply using a flat head screwdriver as it is just held onto the bezel with some adhesive.
You will also need to keep the click spring under the bezel as this is what gives the bezel those distinctive clicks.
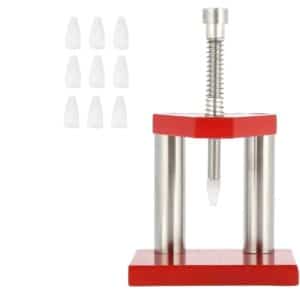
To put the bezel back on the watch you can use a crystal press. Make sure before you push the bezel back on, you put the click spring back in its place. The case has two holes that match the feet of the click spring. It should just set right in those two notches. When you do press the bezel, you will hear a loud “click”, this is very normal and means the bezel is attached. Make sure that it is seated flush against the case evenly around.
For the bezel insert, you will get 3M double sided tape included to help stick it to the bezel. just peel off the 3M sticker and place on the back of the bezel insert. Now, align the bezel insert with the 12 o’clock marker on the dial and press down evenly around.
Watch This Video:
Tools You’ll Need Only If Changing The Bezel/Bezel Insert:
Opening the Caseback
Removing the Caseback of the Seiko SKX007 is fairly simple. Once you have reached removing the case back it means you are on your way to more advanced mods! You could get a Sapphire Glass Caseback to be able to see your Automatic movement, or you may be wanting to remove the movement to do a dial or hand mod. Or you may just want to improve the look since the solid case backs don’t do much for the aesthetics of the watch.
First you will need the proper tool to remove the Case back. If you bought the Amazon kit mentioned earlier in this tutorial, then you will already have the right tool. However, if you are only wanting to change the case back to a display glass back, then all you will need is a Jaxa Wrench and some Silicone Grease.
There are notches around the SKX007 caseback, simply align the tools teeth with the notches on the caseback and turn counterclockwise. There will be different size teeth included with the caseback wrench, make sure to pick the right sizes that fit into the notch without any wiggle room.
* Remember to wear gloves or finger cots after you remove the case back. This will prevent any smudges and also will protect the movement from the natural greases from our skin.
Once you remove the caseback then you will have the automatic movement exposed, and you want to be careful not to damage the balance wheel or any other part. remove the old case back gasket and grease your new gasket. Lay the new gasket into position with tweezers. Once you set the new caseback into place, screw it backwards (counterclockwise) until the threads fall into place, now you can tighten it Clockwise with your Jaxa wrench. Make sure you tighten it as much as it can go without slipping the wrench.
Once you have finished this mod you will need to pressure test it since you compromised the water resistance when opening the case.
Watch This Video:
Tools You'll Need Only If Removing The Caseback:
Learn How To Mod the Crystal
Changing the Crystal in your Seiko SKX007 is one of the most common mods people love to perform. Not only can you change the look of your watch, but you can upgrade Seiko’s Hardlex to a quality Sapphire Cystal. The reason Sapphire is used in watch crystal upgrades, is due to its resistance to scratches. Sapphires are a 9 on the Mohs scale, which means they are almost as hard as diamond!
Different crystal shapes will give you different looks to your Seiko, but also determines the bezel insert you can use. Due to the popularity of Seiko modding in recent years it is easier than ever before to find the right style crystal for your mod!
*Make sure if you are keeping the original flat SKX007 insert, you will need to use a flat insert compatible sapphire like our Flat Sapphire Crystals.
Double Domed Sapphire Crystal
The most common form of sapphire crystal especially for the SKX007 upgrade is the doubled domed Sapphire. The Double Domed Sapphire crystals match Sloped Bezel Inserts. There are a few suppliers that sell double domed sapphire crystals that are compatible with flat bezel inserts, so make sure you read the descriptions carefully.
Top Hat Sapphire Crystal
If you want to give your SKX007 a vintage vibe to it, then as tophat Sapphire is the way to go! They are named TopHat after the uncanny resemblance to one. These crystals can usually take sloped and flat bezel inserts.
Flat Sapphire Crystal
If you are wanting to keep the same original look of your SKX007 then the flat Sapphire is the easiest way to go, as it will keep the original look of the watch but with the added upgrade of it being a sapphire crystal. It will also fit the OEM flat bezel insert as well. Please note that some suppliers do sell flat crystals that are compatible with sloped inserts so make sure you read the descriptions carefully.
First you will need to remove the Caseback as learned in the previous section of this tutorial. Use your Jaxa Wrench and remove the case back.
**Remember to wear finger cots once the case back is open to protect the Movement, Dial, and Hands from any damage or smudges.
Once you remove the case back, you will now need to remove the stem of the movement. The stem is attached to the crown which is what you use to set the time and date of your watch. To remove the stem, unscrew the crown to its first position (Make sure the stem is not in the time setting or date setting position, because in that position the setting lever will not be accessible) and using your tweezers or a toothpick push down on the setting lever arm and pull out the stem using the crown to hold onto as you are pushing down on the arm. If the rotor is above the setting lever, move it out of the way using a toothpick, or just turn the watch away from the stem and the rotor should rotate away.
Now use a movement cushion to flip the movement out of the case. If the movement doesn’t come out when you turn the case over, then use a small toothpick to pop one end of the movement up, closest to the crown and then flip it over again. At this point the movement should come right out and sit on the cushion.
Once you have the movement assembly out of the case, set it aside along with the crown and stem and cover it so you can prevent dust from accumulating on the dial. You can cover it with a proper parts dust cover, or you can use a small plastic cup.
Now that you have the case empty, you can pop the crystal out using a crystal press. The chapter ring is held into place between the case and the crystal so removing the crystal will also remove the chapter ring. Make sure you are mindful of the chapter ring as to not scratch or damage it. you can set that to the side.
Now you will need to replace the chapter ring or reinstall the old one. there is an alignment tab on the bottom of the chapter ring at the 12:00 position. This alignment tab sits into a notch on the case. Once you have this into position, you can place the crystal gasket in its appropriate place where the crystal will sit.
For the final step you will place the sapphire gently into the opening with the crystal gasket. You will not be able to push it in by hand, but make sure it is sitting evenly around and not sitting on any part of the gasket. Now take your crystal press and find the right sized die to place on it. gently press (don’t push the crystal all the way in yet!) and turn the watch 90 degrees and gently press again. keep turning the watch while gently pressing until the sapphire is completely seated evenly in the case. This can be difficult if it is your first time doing this, so just take your time and be patient.
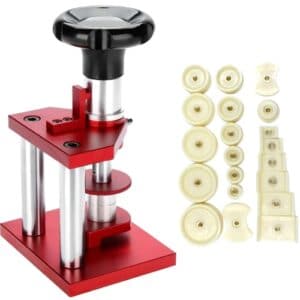
There Are 2 Types Of Press Available:
Watch This Video:
Tools You'll Need If Only Replacing The Crystal:
- Jaxa Wrench
- Tweezers
- Crystal Press
- Finger Cots
- Silicone Grease (for the case back only)
- Movement Cushion
- Dust Tray
Learn How To Mod The Hands
Arguably one of the mods with the steepest learning curve is changing the hands. Modding the hands of your Seiko SKX can prove to be challenging the first time. However, once you get the hang of it, installing them will become easier and easier.
This mod requires a lot of tools, patience and a very steady hand. Fortunately, finding hands to mod your Seiko can be very simple. With all the variety on the market today, you are not short of options by any means.
Hands made for the 7s26 are completely compatible with a wide range of movements from Seiko (7S26, 7S36, 4R15, 4R35, 4R36, 6R15, NE15, NH25, NH26, NH35, NH36, NH37, NH38, NH39, NH70, NH71, NH72).
The hand sizes for the NH35 (and 7S26) are as follows;
- Hour Hand: 1.50
- Minute Hand: 0.90
- Second Hand: 0.20
A wide variety of hands that are compatible with your Seiko mod can be found HERE
Removal Of The Hands
Now to get into the actual modding.
First you will need to follow the previous tutorial of removing the caseback using your Jaxa Wrench.
I use the caseback wrench that I received with the repair set from amazon mentioned earlier in this tutorial. Align the tool with the notches on the SKX007 caseback and turn counterclockwise to unscrew it.
**Remember to wear finger cots after removing the caseback for the remainder of the mod. This will prevent the natural oils in our skin from getting onto the dial or the hands and preventing an accumulation of dust as well.
Once you remove the case back, you will now need to remove the stem of the movement. The stem is attached to the crown which is what you use to set the time and date of your watch. To remove the stem, unscrew the crown to its first position (Make sure the stem is not in the time setting or date setting position, because in that position the setting lever will not be accessible) and using your tweezers or a toothpick push down on the setting lever arm and pull out the stem using the crown to hold onto as you are pushing down on the arm. If the rotor is above the setting lever, move it out of the way using a toothpick, or just turn the watch away from the stem and the rotor should rotate away.
Now you can set your case to the side in your dust tray to keep it clean. Now you will need a movement holder to keep the movement steady while performing the next step. Place the 7S26 movement assembly into your movement holder and reinsert the stem and crown into the movement. When the stem is reinserted, pull it out into the time setting position. Now set the time to midnight (hour and minute hand at 12 during a date change). Slide a dial protector onto the dial yet under the hand, this will protect the dial from scratches during the hand removal. There are two methods of hand removal, one using a compression tool that removes all 3 hands at once, or a set of 2 hand levers that give you more control. I use the compression tool as it’s quicker and won’t scratch the dial if you are using your dial protector. Just line the compression tool over the hands (remember to have them at midnight) and align the tool over the center of the second hand pinion. Now simultaneously press the sides of the tool together while pushing the top of the tool down as well. This should “Pluck” the hands off of the movement. You can now set the hands to the parts tray using a small piece of rodico (watch makers clay).
Installing The Hands
To put the old hands back on or to install a new set of hands, first rotate the crown until the date flips over. STOP immediately after the date changes, thisposition is where the hour and minute hand would both be at midnight. Here you can use the tweezers (I recommend brass tweezers as it is a softer metal) or if you want to be safer use Rodico (This is what I like to use when installing hands). Rodico is less likely to allow any scratching of the hands but some people are still more confident to use the tweezers.
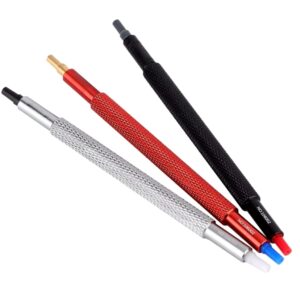
There are two types of hand press tools, and which one you get is all dependent on what you feel comfortable with. The first type is the pen style hand press and the stand style press. I prefer the pen style hand setter tools as it gives you more control and freedom. Regardless of which style you pick, you must first make sure the hole on the tip you use is the right fit for the hand you are installing. As the holes at the tip determine how much you can push down on to the movement. The hour hands will require a bigger hole at the tip while the second hand will require the flat end with no hole. An easy way to determine what tip you will need is to place the pusher over the pinion and find which size slides over the hour pinion. That will be the tip size you use for the hour hand. Now do the same to determine the size you will need for the minute hand. Find the tip that slides over the minute pinion but is NOT big enough to fit the hour pinion. When you line up the hour hand at 12 just press down slowly with little pressure until it sets properly, too much pressure can cause it to bend or set in the wrong position. Be careful to not slip and scratch or bend the hands as they are very fragile.
Now rotate the crown to make sure the hour hand moves freely and correctly around the dial. line it back up at 12 right at the date change . You can also use a loupe to manually check this just to be sure that there is enough clearance between the hand and the dial.
Once you have the hour hand lined up at the 12 o’clock position, repeat the same process for the minute hand and make sure it aligns perfectly with the hour hand and the 12 o’clock position.
Now press down with the hand setting tool to push the minute hand on. Make sure you check to make sure that the hands are straight and evenly spaced from each other from base to tip. Manually inspect it with the loupe and turn the crown once again to make sure both hands rotate freely without catching on each other or on the hour markers of the dial. Check the date change one more time and make sure it flips right as the minute hand comes to midnight. The second hand does not need to be aligned with the other hands as it is constantly turning. So, I like to place the second hand on at the 6 o’clock position to give me more room to install it without the hour and minute hands getting in the way. The second hand is arguably the hardest hand to install for beginners. It rests on a tiny pinion that looks like a small needly.
The key to installing the second hand is:
- good lighting
- good magnification
- and get down eye level to the movement.
If you have those 3 things then installing the second hand will be a breeze, just look at the second hand rest on the pinion with your loupe as you press down with your hand press.
That’s it! You have officially changed the hands of your Seiko SKX007. Make sure you clean your dial and case with a little Rodico and a dust blower before reinserting the movement back into the case.
Simply place it back inside the case minding where the stem and crown gets attached to the movement, reattach the stem and crown and use the caseback remover to seal the caseback on properly and you are all done.
Watch This Video:
Tools You'll Need If You Are Replacing The Hands:
Learn How To Mod The Dial
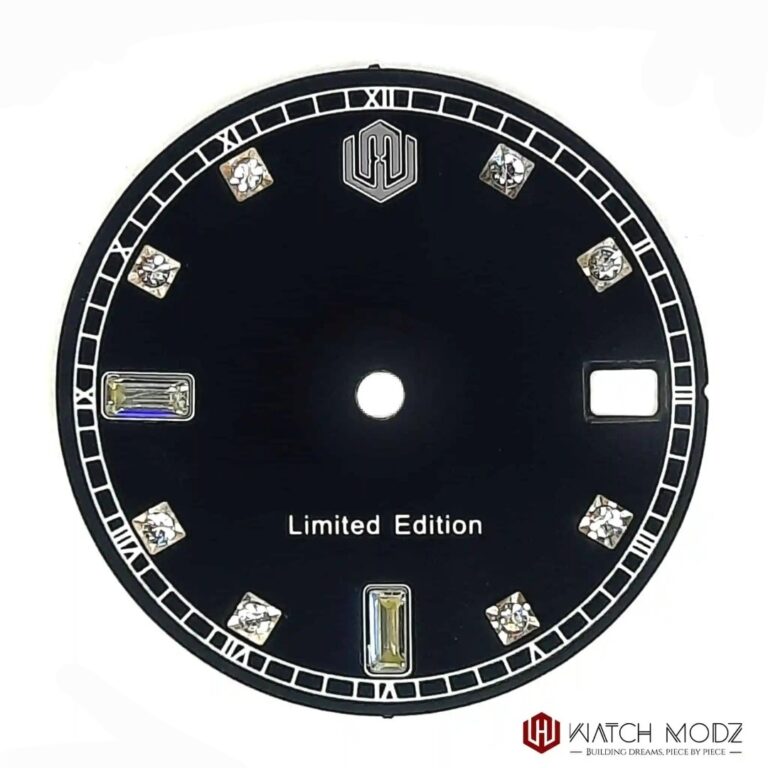
Changing the dial is similar to changing the hands with just 1 added step. That is because it is impossible to change the dial of your Seiko without first removing the hands. Choosing the dial you like is simple, first decide if you will use a date only (NH35) dial, or a day & date (NH36) dial . You have to purchase a dial that is both compatible with the case and the movement, and Seiko SKX007 cases specifically take 28.5mm. So all you need to look for is a 28.5mm Dial for NH#5 which you can find plenty of HERE.
Make sure if you use a NH35 movement you also use a NH35 dial, for NH36 movements both a NH35 and NH36 dial will work properly. There is no need to remove the day wheel if using a date only dial, as it will not interfere with the dial. Now, let’s get into the modding part.
First like the other mods, you will need to remove the case back with a Jaxa wrench.
For this I use the Jaxa Wrench that I received with the repair kit from amazon. Simply align the tool with the notches on the SKX007 caseback and turn counterclockwise to unscrew it.
*Remember to wear finger cots from this point on, this will prevent any smudges and also to protect the movement, dial and hands from the natural oils in our skin.
Once you remove the caseback then you will have the automatic movement exposed. Before you can remove the movement you have to remove the crown and stem. The stem is attached to the crown which is what you use to set the time and date of your watch. To remove the stem, just unscrew the crown to its winding position (Make sure the stem is not in the time setting or date setting position, as during that position the setting lever will not be accessible). Using your brass tweezers or a toothpick push down on the setting lever and pull ouit on the crown as you are pushing down and it should come out relatively easily. If the rotor is above the setting lever, move it out of the way using a toothpick.

Once you remove the case back, you will now need to remove the stem of the movement. The stem is attached to the crown which is what you use to set the time and date of your watch. To remove the stem, unscrew the crown to its first position (Make sure the stem is not in the time setting or date setting position, because in that position the setting lever will not be accessible) and using your tweezers or a toothpick push down on the setting lever arm and pull out the stem using the crown to hold onto as you are pushing down on the arm. If the rotor is above the setting lever, move it out of the way using a toothpick, or just turn the watch away from the stem and the rotor should rotate away.
Now you can set your case to the side in your dust tray to keep it clean. Now you will need a movement holder to keep the movement steady while performing the next step. Place the 7S26 movement assembly into your movement holder and reinsert the stem and crown into the movement. When the stem is reinserted, pull it out into the time setting position. Now set the time to midnight (hour and minute hand at 12 during a date change). Slide a dial protector onto the dial yet under the hand, this will protect the dial from scratches during the hand removal. There are two methods of hand removal, one using a compression tool that removes all 3 hands at once, or a set of 2 hand levers that give you more control. I use the compression tool as it’s quicker and won’t scratch the dial if you are using your dial protector. Just line the compression tool over the hands (remember to have them at midnight) and align the tool over the center of the second hand pinion. Now simultaneously press the sides of the tool together while pushing the top of the tool down as well. This should “Pluck” the hands off of the movement. You can now set the hands to the parts tray using a small piece of rodico (watch makers clay).
Now that you have your Seiko stripped down to just the movement and the dial, you can proceed to remove the dial from the movement. To remove the dial, you will notice two small notches at 9 o’clock and at 2 o’clock on the side of the movement spacer. You can place a small flat head screwdriver into these notches and twist to pop the dial feet out of the movement spacer. You should now be able to just lift the dial away from the movement and place into your dust tray.
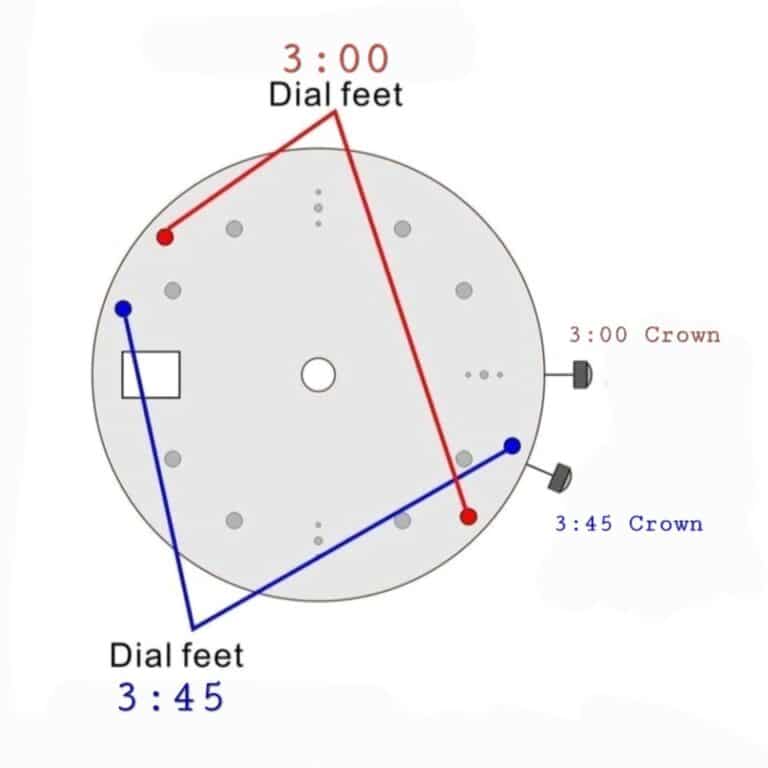
Now most aftermarket dials will come with 4 dial feet. OEM Seiko dials will only come with the 2 dial feet specific for the case that dial is from. The two dial feet you use are dependent on which case you use. For example, a case with a 3 o’clock crown will use the opposite two feet than a case with crown at 3:45 crown. Two of the dial feet will be for a 3 oclock position and 2 feet will be for a 3:45 position crown.
You have to remove the two feet that do not match the orientation for your crown position. (See diagram below)
Reassembly
Once you have removed the 2 feet you do not need, you will need to file off the remaining nubs from the dial, you want it to be as flat as possible so it sits correctly. Just use a small flat jewelers file to file them flat. Now just push the remaining two feet into the holes on the movement spacer that the old dial came out of.
If your dial has no feet underneath you have to use adhesive or dial dots to stick it on the outer ring of the dial. You can use 3M double sided tape if they do not provide you with any and place it on the outer plastic ring of the movement, avoid putting any in the middle of the movement and do not let it hit the date wheel of the movement as it needs to spin freely without obstruction.
Now that you have attached a new dial to the movement you will need to start reassembly. Start by either reinstalling the old hands or installing a new set of hands to match your new dial.
To put the old hands back on or to install a new set of hands, first rotate the crown until the date flips over. STOP immediately after the date changes, this position is where the hour and minute hand would both be at midnight. Here you can use the tweezers (I recommend brass tweezers as it is a softer metal) or if you want to be safer use Rodico (This is what I like to use when installing hands). Rodico is less likely to allow any scratching of the hands but some people are still more confident to use the tweezers.
There are two types of hand press tools, and which one you get is all dependent on what you feel comfortable with. The first type is the pen style hand press and the stand style press. I prefer the pen style hand setter tools as it gives you more control and freedom. Regardless of which style you pick, you must first make sure the hole on the tip you use is the right fit for the hand you are installing. As the holes at the tip determine how much you can push down on to the movement. The hour hands will require a bigger hole at the tip while the second hand will require the flat end with no hole. An easy way to determine what tip you will need is to place the pusher over the pinion and find which size slides over the hour pinion. That will be the tip size you use for the hour hand. Now do the same to determine the size you will need for the minute hand. Find the tip that slides over the minute pinion but is NOT big enough to fit the hour pinion. When you line up the hour hand at 12 just press down slowly with little pressure until it sets properly, too much pressure can cause it to bend or set in the wrong position. Be careful to not slip and scratch or bend the hands as they are very fragile.
Now rotate the crown to make sure the hour hand moves freely and correctly around the dial. line it back up at 12 right at the date change . You can also use a loupe to manually check this just to be sure that there is enough clearance between the hand and the dial.
Once you have the hour hand lined up at the 12 o’clock position, repeat the same process for the minute hand and make sure it aligns perfectly with the hour hand and the 12 o’clock position.
Now press down with the hand setting tool to push the minute hand on. Make sure you check to make sure that the hands are straight and evenly spaced from each other from base to tip. Manually inspect it with the loupe and turn the crown once again to make sure both hands rotate freely without catching on each other or on the hour markers of the dial. Check the date change one more time and make sure it flips right as the minute hand comes to midnight. The second hand does not need to be aligned with the other hands as it is constantly turning. So, I like to place the second hand on at the 6 o’clock position to give me more room to install it without the hour and minute hands getting in the way. The second hand is arguably the hardest hand to install for beginners. It rests on a tiny pinion that looks like a small needly.
The key to installing the second hand is:
- good lighting
- good magnification
- and get down eye level to the movement.
If you have those 3 things then installing the second hand will be a breeze, just look at the second hand rest on the pinion with your loupe as you press down with your hand press.
That’s it! You have officially changed the hands of your Seiko SKX007. Make sure you clean your dial and case with a little Rodico and a dust blower before reinserting the movement back into the case.
Simply place it back inside the case minding where the stem and crown gets attached to the movement, reattach the stem and crown and use the caseback remover to seal the caseback on properly and you are all done.
Watch This Video:
Tools You'll Need When Replacing The Dial:
Upgrading Your Movement
How to mod your OEM Seiko SKX007 Movement (7S26) to an upgraded NH36. Even though this modification does not change the look of your Seiko, it will increase the quality. With the NH36 you gain Hacking, and hand-winding for your watch.
Hacking can be beneficial when setting the time or synchronizing times. What hacking means is that when you pull the crown to set the time of the watch, the seconds hand will stop running. In the original SKX007 the 7S26 does not stop running when setting the time.
Hand-winding is also an advantage of having an NH36 rather than a 7S26. Hand-winding is exactly like it sounds, you can hand-wind the movement instead of shaking the watch to power it like the 7S26.
*This mod does not change the appearance but rather enhances the quality of the watch.
Upgrades for the 7s26 include the 4R36 or NH36 movement. You can also upgrade to an NH35 if you change the dial to a date only dial. The NH35 and NH36 are virtually identical except the NH35 is date only sand the NH36 is day & date. The NH36 and 4R36 are also virtually identical, except the 4R36 is Seiko’s branded movement while the NH36 is Seiko’s unbranded movement meant for microbrands. The NH36 is a much more accessible movement than the 4R36 as you can purchase it from a variety of sellers for a more affordable price.
The original 7S26 stem will not work in the new NH36 movement, and the original crown is not separable from the original stem. So in this case you will need to use the new stem provided with the movement, and you will also need to purchase a new crown.


First like the other mods, you will need to remove the case back with a Jaxa wrench.
For this I use the Jaxa Wrench that I received with the repair kit from amazon. Simply align the tool with the notches on the SKX007 caseback and turn counterclockwise to unscrew it.
*Remember to wear finger cots from this point on, this will prevent any smudges and also to protect the movement, dial and hands from the natural oils in our skin.
Once you remove the caseback then you will have the automatic movement exposed. Before you can remove the movement you have to remove the crown and stem. The stem is attached to the crown which is what you use to set the time and date of your watch. To remove the stem, just unscrew the crown to its winding position (Make sure the stem is not in the time setting or date setting position, as during that position the setting lever will not be accessible). Using your brass tweezers or a toothpick push down on the setting lever and pull ouit on the crown as you are pushing down and it should come out relatively easily. If the rotor is above the setting lever, move it out of the way using a toothpick.
Once you remove the case back, you will now need to remove the stem of the movement. The stem is attached to the crown which is what you use to set the time and date of your watch. To remove the stem, unscrew the crown to its first position (Make sure the stem is not in the time setting or date setting position, because in that position the setting lever will not be accessible) and using your tweezers or a toothpick push down on the setting lever arm and pull out the stem using the crown to hold onto as you are pushing down on the arm. If the rotor is above the setting lever, move it out of the way using a toothpick, or just turn the watch away from the stem and the rotor should rotate away.
Now you can set your case to the side in your dust tray to keep it clean. Now you will need a movement holder to keep the movement steady while performing the next step. Place the 7S26 movement assembly into your movement holder and reinsert the stem and crown into the movement. When the stem is reinserted, pull it out into the time setting position. Now set the time to midnight (hour and minute hand at 12 during a date change). Slide a dial protector onto the dial yet under the hand, this will protect the dial from scratches during the hand removal. There are two methods of hand removal, one using a compression tool that removes all 3 hands at once, or a set of 2 hand levers that give you more control. I use the compression tool as it’s quicker and won’t scratch the dial if you are using your dial protector. Just line the compression tool over the hands (remember to have them at midnight) and align the tool over the center of the second hand pinion. Now simultaneously press the sides of the tool together while pushing the top of the tool down as well. This should “Pluck” the hands off of the movement. You can now set the hands to the parts tray using a small piece of rodico (watch makers clay).
Now that you have your Seiko stripped down to just the movement and the dial, you can proceed to remove the dial from the movement. To remove the dial, you will notice two small notches at 9 o’clock and at 2 o’clock on the side of the movement spacer. You can place a small flat head screwdriver into these notches and twist to pop the dial feet out of the movement spacer. You should now be able to just lift the dial away from the movement and place into your dust tray.
Learn How To Mod The Day Wheel
Now that you have the dial removed and you are ready to upgrade your 7S26 you will need to choose the correct movement. If you are using the same SKX007 dial with the day & date, then you will need an NH36. If you are changing the dial to a date only dial, you can opt for the NH35, and a no date dial you can choose either a NH38 or a NH70 Skeleton Movement. (If you opt for the NH70 Skeleton movement you will also need to purchase your gray spacer separately and upgrade your caseback. You could also use the original black spacer on the NH70 if using the original caseback)
If you are upgrading to a NH36 Movement and installing into a 3:45 crown case (such as the SKX007) you will need to change your day wheel. Let me explain. Most NH36 movements come with the day wheel lined up for a 3:00 crown not the SKX007 3:45 crown. In order to get the day to line up correctly you will need to change the day wheel to the correct 3:45 orientation. You can do this by removing the old day wheel from your 7s26 and installing it onto your new NH36 movement. If you’re uncomfortable with doing this, you can purchase an NH36 3.8 that already has the correct day wheel installed.
Let’s review the steps to this day wheel swap.
Step 1
Changing the day wheel from your 7S26 movement over to your new NH36 movement can feel intimidating, but don’t worry! This is a very simple mod and you can accomplish it very easily.
First you will need to remove the C-clip from the NH36 movement.
*This is a “c” shaped piece of metal that holds down the day wheel. The C-clip can be seen wrapped around the base of the hour hand pinion in the center of the movement.
Find your smallest flat head screwdriver for this job. You will need to slide the flat head screwdriver under one side of the C-clip and very gently pop it up NOT all the way yet. Once one half is popped up slightly, gently work your way around until it is completely off, this will help prevent it from springing off and getting lost. Be very careful as these do like to shoot across the room if you are not gentle. See the following photos for reference.


Step 2
Now that you have the C-clip removed you can move on to the next step. Some people like to use tweezers to grab the day wheel and remove it from the movement. However, to prevent any scratches on the day wheel we like to use a small bit of Rodico to “lift” the day wheel off of the movement and place it into our dust tray. You can now repeat this process to remove the day wheel from your OEM 7S26 movement to get it ready.
*You will notice on the back of the day wheel is a small black gear glued on, DO NOT remove this gear as this is how the day wheel changes. Please see the following photos for reference.


Reassembly
Now that you have your day wheel replaced, you can now start reassembling your SKX007. You will need to start installing the dial back onto the watch. This is a great time to upgrade your dial if you are interested to do so. Let’s talk about aftermarket dials.
Now most aftermarket dials will come with 4 dial feet. OEM Seiko dials will only come with the 2 dial feet specific for the case that dial is from. The two dial feet you use are dependent on which case you use. For example, a case with a 3 o’clock crown will use the opposite two feet than a case with crown at 3:45 position. Two of the dial feet will be for a 3 o’clock position and 2 feet will be for a 3:45 position crown.
You have to remove the two feet that do not match the orientation for your crown position. (See diagram below)
Once you have removed the 2 feet you do not need, you will need to file off the remaining nubs from the dial, you want it to be as flat as possible so it sits correctly. Just use a small flat jewelers file to file them flat. Now just push the remaining two feet into the holes on the movement spacer that the old dial came out of.
If your dial has no feet underneath you have to use adhesive or dial dots to stick it on the outer ring of the dial. You can use 3M double sided tape if they do not provide you with any and place it on the outer plastic ring of the movement, avoid putting any in the middle of the movement and do not let it hit the date wheel of the movement as it needs to spin freely without obstruction.
Now that you have attached a new dial to the movement you will need to start reassembly. Start by either reinstalling the old hands or installing a new set of hands to match your new dial.
To put the old hands back on or to install a new set of hands, first rotate the crown until the date flips over. STOP immediately after the date changes, this position is where the hour and minute hand would both be at midnight. Here you can use the tweezers (I recommend brass tweezers as it is a softer metal) or if you want to be safer use Rodico (This is what I like to use when installing hands). Rodico is less likely to allow any scratching of the hands but some people are still more confident to use the tweezers.
There are two types of hand press tools, and which one you get is all dependent on what you feel comfortable with. The first type is the pen style hand press and the stand style press. I prefer the pen style hand setter tools as it gives you more control and freedom. Regardless of which style you pick, you must first make sure the hole on the tip you use is the right fit for the hand you are installing. As the holes at the tip determine how much you can push down on to the movement. The hour hands will require a bigger hole at the tip while the second hand will require the flat end with no hole. An easy way to determine what tip you will need is to place the pusher over the pinion and find which size slides over the hour pinion. That will be the tip size you use for the hour hand. Now do the same to determine the size you will need for the minute hand. Find the tip that slides over the minute pinion but is NOT big enough to fit the hour pinion. When you line up the hour hand at 12 just press down slowly with little pressure until it sets properly, too much pressure can cause it to bend or set in the wrong position. Be careful to not slip and scratch or bend the hands as they are very fragile.
Now rotate the crown to make sure the hour hand moves freely and correctly around the dial. line it back up at 12 right at the date change . You can also use a loupe to manually check this just to be sure that there is enough clearance between the hand and the dial.
Once you have the hour hand lined up at the 12 o’clock position, repeat the same process for the minute hand and make sure it aligns perfectly with the hour hand and the 12 o’clock position.
Now press down with the hand setting tool to push the minute hand on. Make sure you check to make sure that the hands are straight and evenly spaced from each other from base to tip. Manually inspect it with the loupe and turn the crown once again to make sure both hands rotate freely without catching on each other or on the hour markers of the dial. Check the date change one more time and make sure it flips right as the minute hand comes to midnight. The second hand does not need to be aligned with the other hands as it is constantly turning. So, I like to place the second hand on at the 6 o’clock position to give me more room to install it without the hour and minute hands getting in the way. The second hand is arguably the hardest hand to install for beginners. It rests on a tiny pinion that looks like a small needly.
The key to installing the second hand is:
- good lighting
- good magnification
- and get down eye level to the movement.
If you have those 3 things then installing the second hand will be a breeze, just look at the second hand rest on the pinion with your loupe as you press down with your hand press.
Trimming the Stem and Replacing the Crown
Now all that’s left to do is trim your stem and replace your crown with your new aftermarket crown. This is a simple mod that a lot of modders are intimidated by on their first try. I’m here to tell you it is not difficult at all! Let’s get started with this simple mod.
First you will have to insert your new NH36 movement (with dial and hands) into your SKX case. The stem that comes with your new movement is specifically for NH36 and will come much longer than needed. This is because every case uses a slightly different length of stem and there is no “one size fits all” type of cut.
You will need to screw your new crown onto your NH36 stem . Hold the stem with some pliers or pin vice and tighten the crown onto it by hand. DO NOT use Loctite yet! Insert your new stem/crown into your movement and note that it extends much farther from the case then needed. Now it is time to measure how much you will need to cut off.
There are two different effective methods for trimming your stem to the correct length. I will start with the most common form of measurement. Now that you have your stem/crown inserted into the movement you can take a pair of digital calipers and measure from the base of the crown the the top of the crown tube (see below image for reference). Write down the measurement you get from the calipers. Now you will need to remove the stem from the movement and remove the crown from the stem. If you recorded, for example 6mm then you should cut slightly less than that from the stem (5.8mm) to give yourself room to work with. It is better to cut the stem too long and go back to trim more, than it is to trim it too short and not being able to use it any longer. Always give yourself some slack on that stem!


There is a second method of measuring if you do not have calipers handy, however I highly suggest the calipers!
You can also insert the stem/ crown and mark he stem where it meets the top of the crown tube with a small dot of white out or sharpie. Now, remove the stem and crown to prepare for the cut.
To cut down the stem you can use flush cutters or I just use a cheap pair of nail clippers. Both the flush cutters and the nail clippers can get the job done as the stem is not very strong. After you cut the amount of the stem off that you need, (remember to keep it slightly longer than than what you want it to be) replace the crown. Now reinsert the ste4m and see how close you are to where you need to be with the length.
If the stem is slightly too long then remove it from the movement and remove the crown from the stem once again. Now you will need to take your jewelers files and file off just a small amount of the stem. Reinsert the crown and stem into the movement and you should be perfect. If your stem is still slightly too long just repeat the process of filing the stem a little at a time until the length is where you need it to be. You will know the length is correct when you can wind the movement without the crown screwing down, but when you do screw the crown down there is no gap between crown and case.
Now you will have to remove the stem one last time and unscrew the crown. You will now need to ensure that the crown doesn’t fall off once the watch is complete. How can you do this? Well it’s simple, Loctite! . You only need a little bit applied to the end of the stem that the crown will screw onto. Then screw the crown back on and wipe off any excess, now let it dry.
Once the Loctite is dry you can reinsert the stem into the movement and test to make sure everything works properly, including setting the time and screwing down the crown. Once everything is functioning correctly, install the caseback and the strap and you are officially done with this mod.
Congratulations! This is one of the most difficult mods you can perform as a beginner.
Watch This Video:
Tools You'll Need When Upgrading Your Movement:
This is a living tutorial and will constantly be updated with relevant information about modding your SKX007. So, don’t worry if you run into an issue or mod not yet available in this “learn how to mod” tutorial section.
Disclaimer: Please read our Privacy Policy to learn more about backlinks on our website and how our company may be compensated from third-party websites.*